
Blog
Sparkle & Shine: Adding Glitter and Rhinestones to Your Custom Tumbler
Discover the Joy of Custom Glitter Tumblers: Why This DIY Project Sparkles
Ever seen those dazzling, personalized tumblers and thought, ‘I wish I could make that!’? Well, get ready, because diving into how to glitter a tumbler is an incredibly fun and rewarding DIY journey! It’s more than just a craft; it’s about bringing your unique vision to life, step by sparkling step.
Imagine sipping your morning coffee or staying hydrated with a tumbler that perfectly reflects your personality. That’s the magic of custom creations! You get to choose every color, every sparkle, making something truly one-of-a-kind. This project is a fantastic opportunity for tumbler crafts enthusiasts.
This isn’t just a simple project; it’s a creative escape. Learning how to glitter a tumbler allows you to unwind, express your artistic side, and create something beautiful. Plus, the finished product makes an amazing, heartfelt gift for friends and family!
The joy comes from seeing your idea transform into a durable, shimmering object. From the initial concept to the final, smooth finish (much like an epoxy tumbler), you’re building something truly special. It’s an empowering process that adds a personal touch and a whole lot of glam to your everyday.
Essential Tools and Materials: Everything You Need for a Flawless Glitter Tumbler
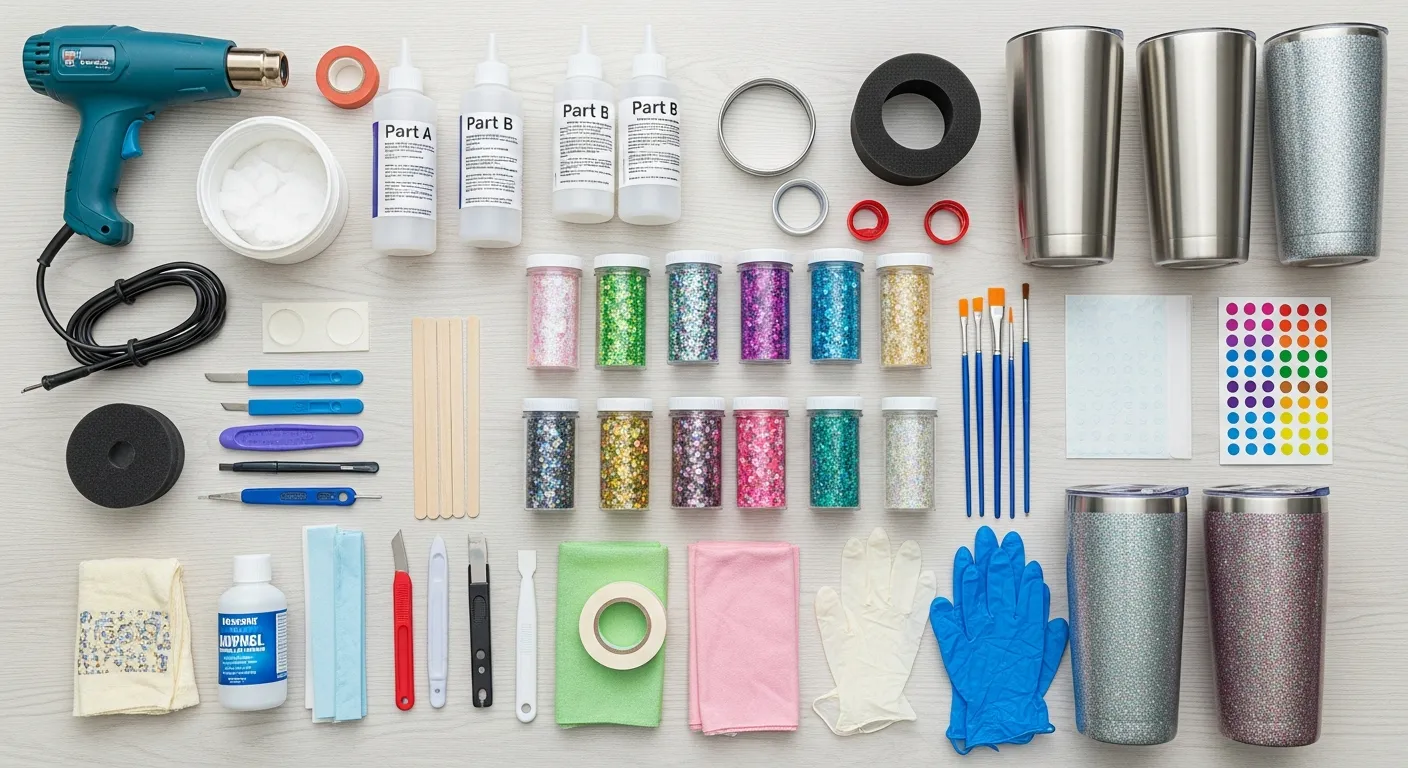
Okay, you’re ready to dive into the wonderful world of custom tumblers! Before we jump into the actual steps of how to glitter a tumbler, let’s gather all your essential supplies. Having everything ready makes the entire process of creating your sparkling masterpiece smoother and more enjoyable. This careful preparation is key to mastering how to glitter a tumbler successfully, ensuring a brilliant finish and proper sealing glitter.
Here’s what you’ll need for this exciting tumbler crafts project:
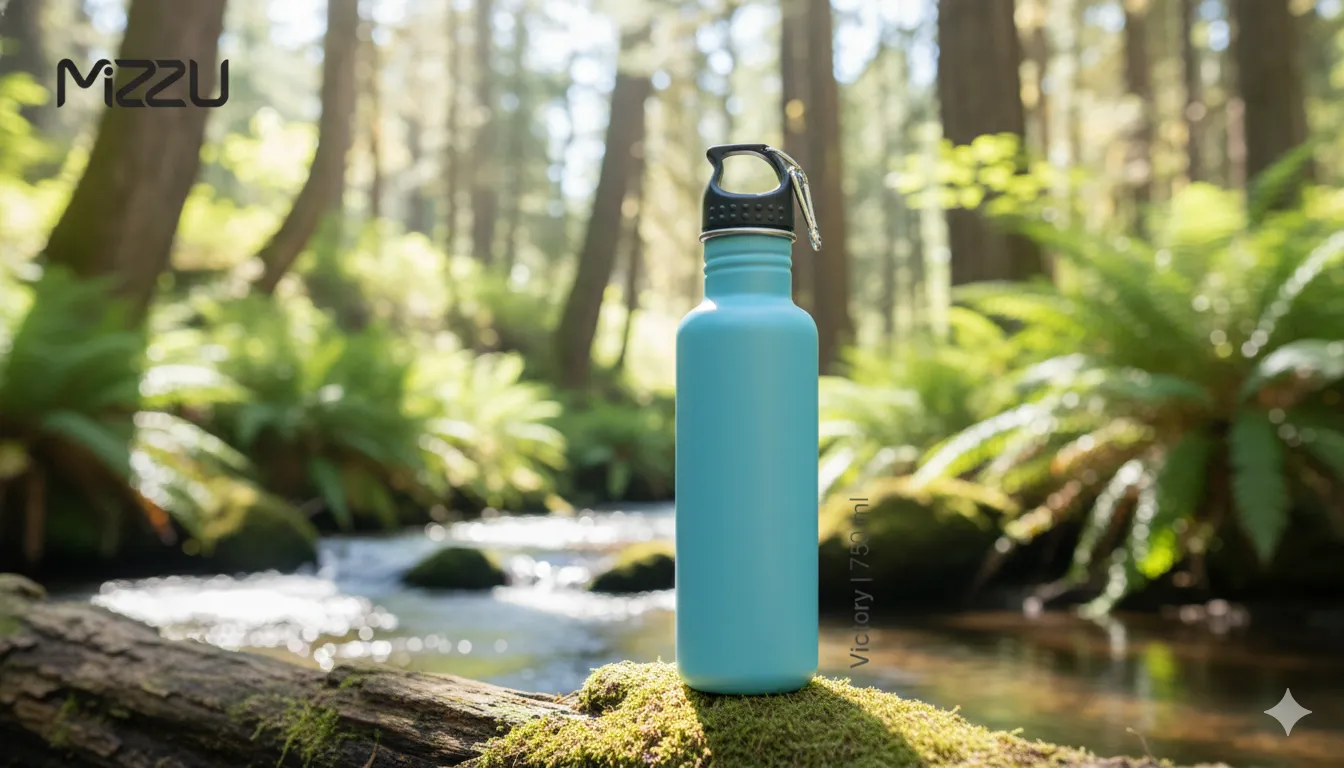
- Stainless Steel Tumbler: A clean, prepped canvas is key!
- Glitter: Fine, extra-fine, or chunky – pick your sparkle! Polyester glitter is generally recommended for its durability.
- Adhesive: Mod Podge (dishwasher safe is a plus!) or a quality spray adhesive for applying glitter to tumblers.
- Epoxy Resin: A two-part epoxy system provides that gorgeous, durable, glassy finish, much like a professional epoxy tumbler.
- Safety Gear: Gloves and a respirator mask are non-negotiable when working with epoxy.
- Foam Brushes/Applicators: For smooth, even adhesive application.
- Crafting Mat/Tray: To catch excess glitter and maintain a tidy workspace.
- Tumbler Turner (Highly Recommended!): This slowly rotates your tumbler for a perfectly smooth, level epoxy coat.
- Mixing Cups & Stir Sticks: Essential for accurately measuring and mixing your epoxy.
- Rhinestones & Gem Glue (Optional): If you’re adding extra bling, choose a strong, clear-drying glue.
- Rubbing Alcohol: For cleaning and degreasing your tumbler before you begin.
The Ultimate Step-by-Step Guide: Mastering How to Glitter a Tumbler Perfectly
Ready to create some magic? This ultimate glitter tumbler tutorial will show you precisely how to glitter a tumbler and achieve that stunning, professional finish. Let’s dive into these fun tumbler crafts!
- Clean & Prep: Wipe your tumbler thoroughly with rubbing alcohol to remove any oils. Lightly sand the surface for better glitter adhesion if desired.
- Apply Adhesive: Brush or spray a thin, even layer of your chosen adhesive onto your tumbler’s surface. Ensure full coverage without drips.
- Glitter Time!: While the adhesive is still wet, generously sprinkle your glitter over the entire surface. Tap off excess glitter onto a tray. This is the heart of applying glitter to tumblers! Let it dry completely.
- Seal Glitter: Once dry, apply a light, even coat of clear spray sealer. This crucial step for sealing glitter prevents fallout and prepares your surface for epoxy. Dry fully.
- First Epoxy Layer: Mix your two-part epoxy. While your tumbler spins on a turner, apply a thin, smooth layer over the glitter. This creates a durable epoxy tumbler base. Allow it to cure completely.
- Add Decorations (Optional): After the first epoxy cures, you can add vinyl decals or rhinestones using strong glue. Let them set completely.
- Final Epoxy Coats: Apply additional thin layers of epoxy until the surface is perfectly smooth, glossy, and all glitter or decals are fully encapsulated. Cure each coat completely.
Beyond the Basics: Advanced Techniques and Creative Twists for Your Tumbler
Ready to level up your creations? After mastering how to glitter a tumbler, explore advanced techniques. These twists make your epoxy tumbler truly unique.
Try these advanced ideas:
- Ombre Glitter: Blend two or more glitter colors for a stunning gradient. Transition colors down the cup, adding depth to how to glitter a tumbler with dimension.
- Pattern Play: Use tape or stencils for crisp lines, stripes, or geometric designs. Apply different glitters to each section, elevating your tumbler crafts.
- Mixing Glitters: Combine various glitter sizes or types for texture and sparkle. This creates a unique, dynamic look before sealing glitter.
- Rhinestone Embellishments: Add rhinestones for ultimate bling! Create full coverage or delicate accents. Place after initial epoxy, secure before final coats. Upgrades your glitter tumbler tutorial.
These techniques demand patience, but dazzling results are worth it. Experiment and enjoy!
Troubleshooting Common Glitter Tumbler Problems and Essential Care Tips
Even following a great glitter tumbler tutorial, learning how to glitter a tumbler can have small hiccups. Don’t fret! Here are common issues and quick fixes.
Common Problems & Solutions:
- Uneven Glitter: Spot bare areas? Lightly sand, then reapply adhesive and glitter for even coverage.
- Air Bubbles: After applying your epoxy tumbler layers, a quick pass with a heat gun or torch will pop those bubbles.
- Glitter Shedding: Your initial sealing glitter might need reinforcement. Apply another thin epoxy layer or a sealant spray.
- Sticky Epoxy: This typically means improper mixing. Sand down the sticky area and reapply correctly.
Essential Tumbler Care:
To keep your sparkling custom tumbler crafts looking their best after learning how to glitter a tumbler, proper care is essential. Protect your beautiful work!
- Hand Wash Only: Use mild soap and cool water. Dishwashers damage the finish.
- Avoid Extreme Heat: Hot cars or microwaves can crack/yellow epoxy.
- No Soaking: Submerging can compromise the seal.
- Gentle Cleaning: Soft cloths only; harsh scrubbing scratches.
Follow these simple tips, and your amazing creation from applying glitter to tumblers will last beautifully!
Your Sparkling Creation: Showcasing and Enjoying Your Handcrafted Tumbler
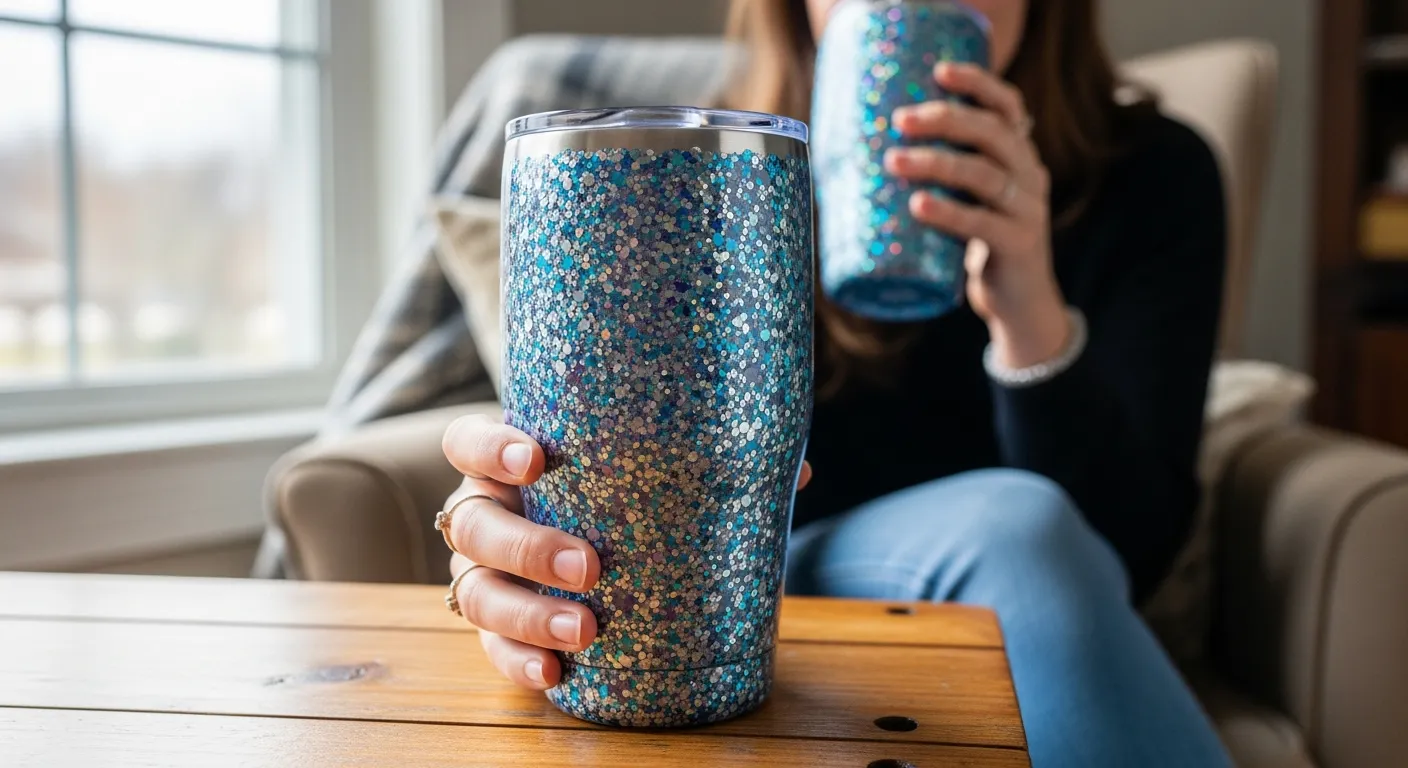
You’ve done it! After all the fun learning how to glitter a tumbler, mixing epoxy, and carefully applying those gorgeous sparkles, your custom creation is finally complete.
It’s time to admire your hard work and let that inner artist shine. Seeing your own design come to life is truly a rewarding feeling!
Now that your beautiful custom epoxy tumbler is fully cured, don’t keep it a secret! Share your masterpiece with the world.
Snap great photos, capturing all the sparkle. Post them on social media and inspire others with your fantastic tumbler crafts.
Consider giving it as a unique, personalized gift. Everyone loves something handmade with love!
But most importantly, enjoy using your new sparkling companion every single day. It’s perfect for your morning coffee, refreshing iced tea, or just keeping water handy.
Every sip will remind you of the creative journey you took to make it. Mastering how to glitter a tumbler isn’t just a craft; it’s about creating functional art.
The joy of having a custom item, knowing you mastered applying glitter to tumblers, is truly special. So, go ahead and sparkle brightly!
Frequently Asked Questions
How do I ensure my glittered tumbler is durable and the glitter doesn’t flake off?
The secret to long-lasting sparkle is proper sealing! After applying your glitter, you’ll want to seal it with multiple thin coats of a good quality sealant. Many crafters swear by a two-part epoxy resin for a glass-like, incredibly durable finish. Alternatively, several coats of a water-based polycrylic or clear spray sealant can work well, though epoxy generally offers the most robust protection. Always allow each coat to fully cure according to the product instructions for the best results.
What’s the best way to clean my custom glittered tumbler without damaging the design?
To keep your glittered and rhinestone-adorned tumbler looking fabulous, handwashing is always recommended. Use mild soap and a soft sponge or cloth, and avoid abrasive scrubbers. Tumblers sealed with epoxy are generally quite waterproof, but it’s best to avoid soaking them or putting them in the dishwasher, as the high heat and harsh detergents can compromise the sealant and adhesives over time.
I’m having trouble getting a perfectly smooth finish with my glitter. Any tips?
Achieving that super-smooth glitter finish often comes down to technique and patience. Start with a very thin, even layer of adhesive, then sprinkle your glitter carefully and evenly, rotating the tumbler as you go. Applying your glitter in 2-3 thin layers rather than one thick one can help. If you’re using epoxy, light sanding with a very fine-grit sandpaper (like 220 grit or higher) between cured epoxy layers can help smooth out any texture before adding your final clear coats. Using extra-fine glitters can also naturally lead to a smoother appearance.
What kind of adhesive should I use for the glitter, and is it different for rhinestones?
Yes, often you’ll use different adhesives for glitter versus rhinestones for optimal results! For glitter, a clear-drying, water-based adhesive like Mod Podge (for a spray or painted-on sealant) or a clear, thin epoxy (for a more durable, embedded finish) works wonderfully. For rhinestones, you’ll want a strong, clear-drying craft adhesive specifically designed for bonding embellishments, such as E6000 or a specialized rhinestone glue. These glues offer a strong, permanent bond that can withstand daily use and washing.